Flux 2 prompts: structure for precise AI images
Vlad Voronezhtsev · · 6 min read

flux 2 is Black Forest Labs' second-generation image model family, and strong flux 2 prompts read like compact art direction: model choice, scene, subject, lighting, camera, material, and constraints. The search phrase flux 2.0 usually points to the same practical need: cleaner prompt structure before spending a final render.
- 1.
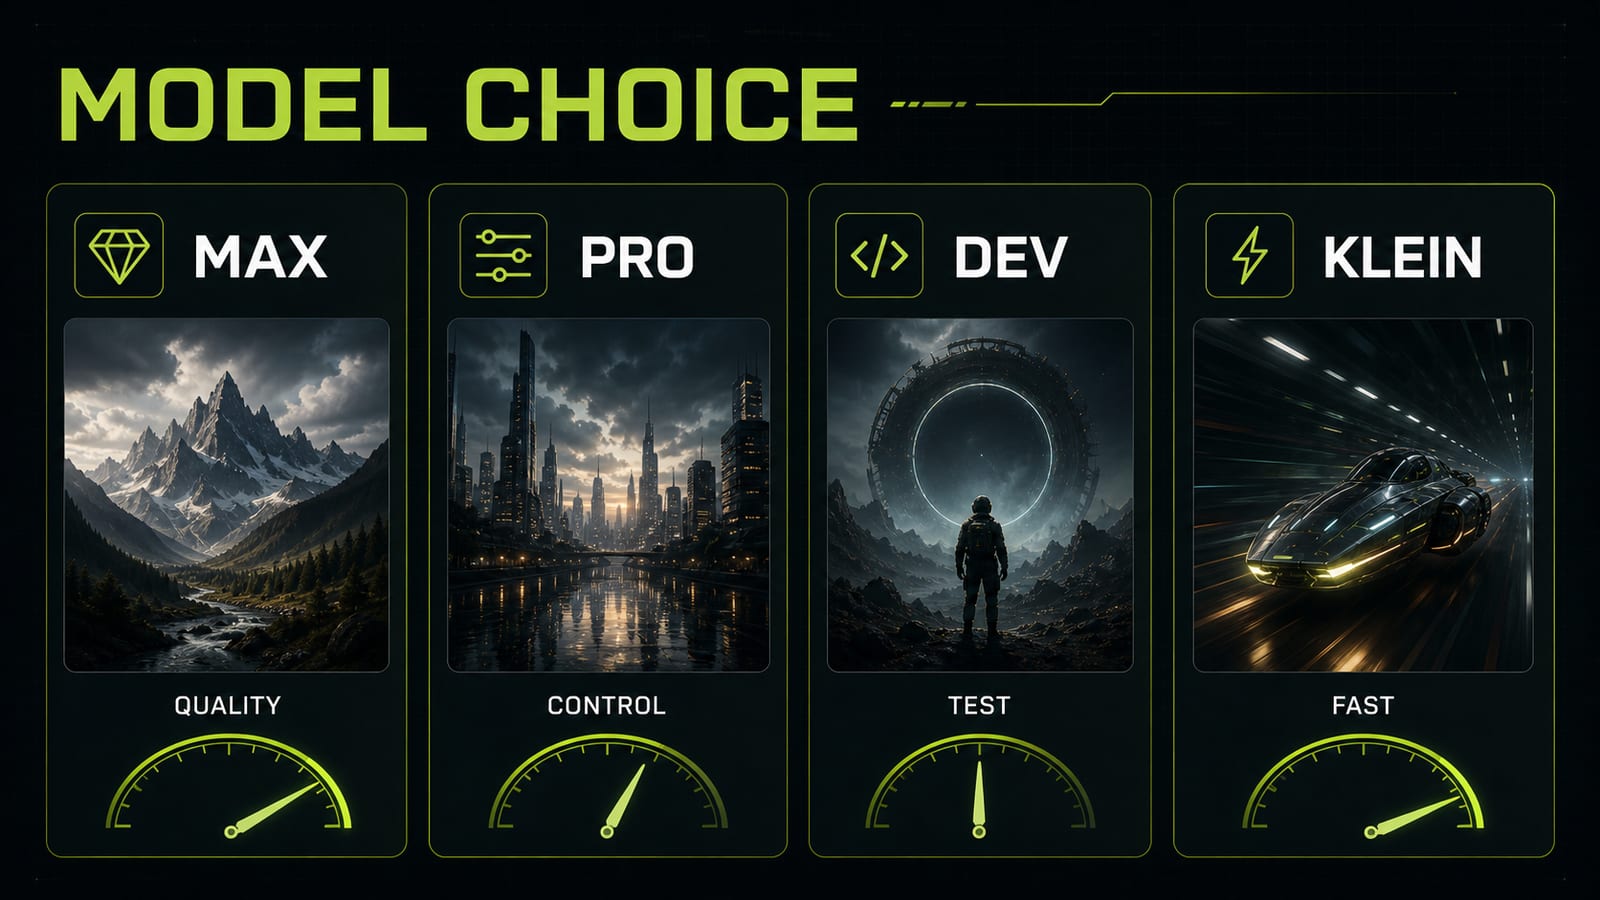
Choose the Flux 2 variant first
A Flux 2 prompt should start from the job, not from the most impressive model name. Flux 2 max and flux 2 pro are the obvious candidates for final images where photorealism, editing quality, and stable detail matter. Flux 2 dev is the open-weight lane for deployable workflows. Flux 2 klein 9B and flux 2 klein 4B are better for fast tests, local prototyping, and latency-sensitive tools. The practical workflow is simple: draft composition and prompt logic on klein or dev, then move the cleaned prompt to pro or max for the final pass. That way the expensive render is solving the image, not discovering that the prompt forgot lighting, material, or constraints.
Before
Flux 2, make a beautiful portrait, realistic, high quality.
After
Model choice: draft on Flux 2 klein 9B, final render on Flux 2 pro.
Goal: editorial studio portrait for a campaign key visual.
Quality target: natural skin, controlled lighting, no plastic texture.
Constraints: keep face realistic, no glossy AI render look, no extra accessories.
- 2.
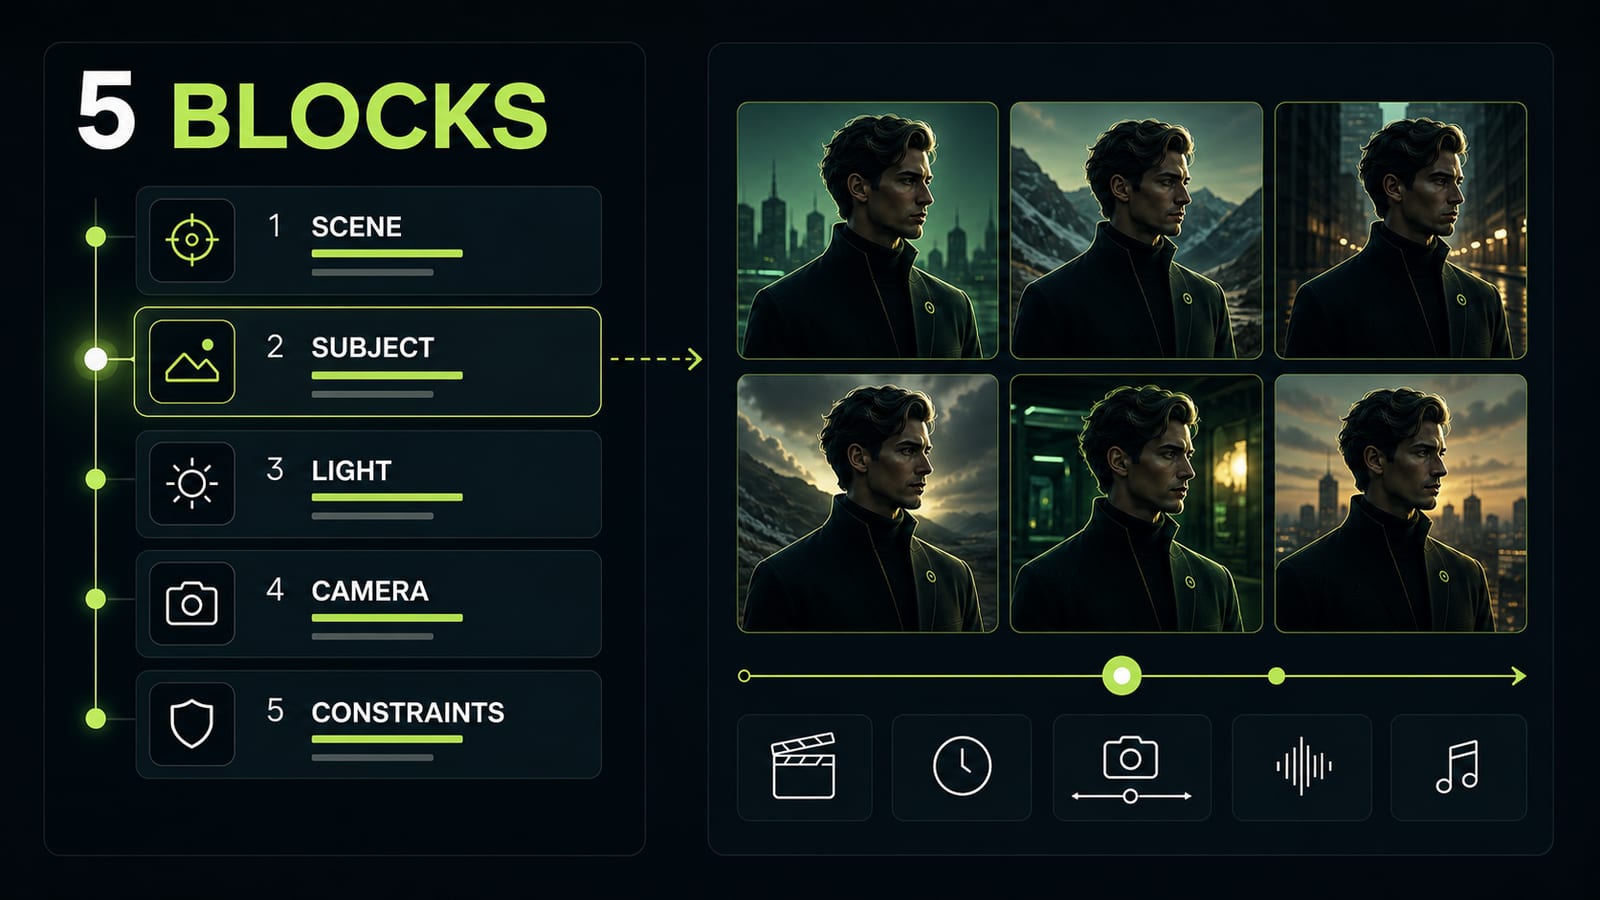
Build the prompt from five blocks
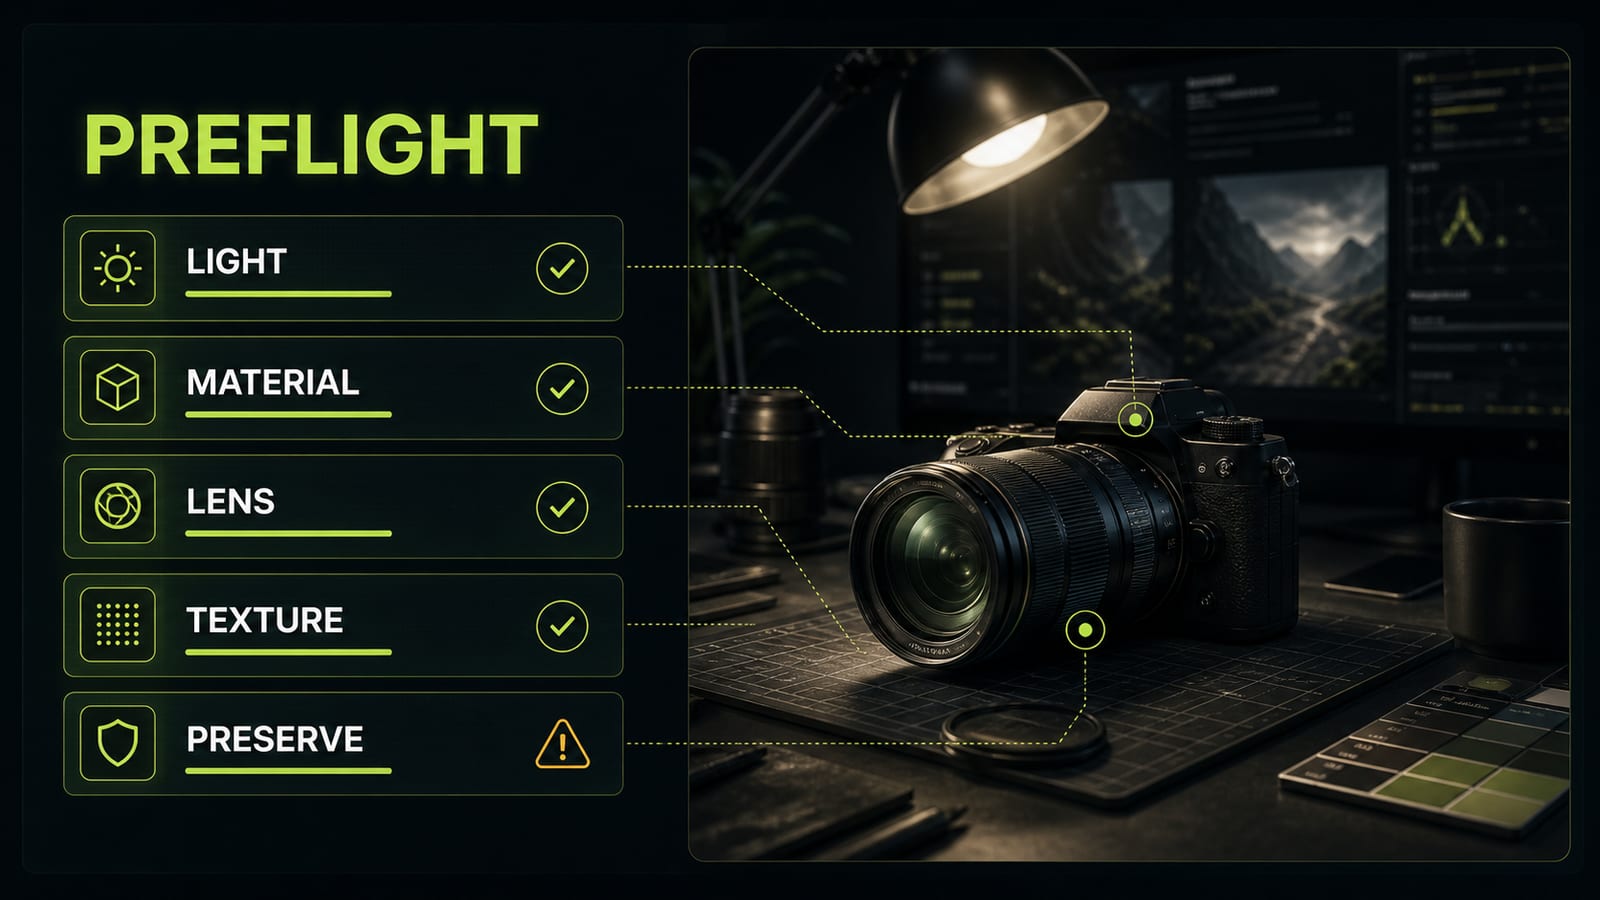
The safest Flux 2 prompt structure is a short production brief, not a tag stream. Use this order: `Scene` -> `Subject` -> `Lighting` -> `Camera` -> `Material / texture` -> `Constraints`. If the first line is only `cinematic, detailed, beautiful`, the model receives mood without blocking. Good flux 2 examples usually declare the image purpose early: campaign portrait, product hero shot, editorial still, catalog image, concept frame. Purpose gives the model a visual mode. Opten can act as the prompt preflight here: it expands a rough idea into blocks and catches missing camera, material, or constraint fields before you render.
Before
Flux 2 prompt generator: beautiful portrait of a man, studio, realistic, high detail.
After
Purpose: editorial studio portrait for a premium skincare campaign.
Scene: dark graphite studio, neutral background, subtle lime rim light.
Subject: man in a black turtleneck, three-quarter view, calm expression.
Lighting: large softbox from front-left, weak rim light from back-right.
Camera: 85mm lens, eye-level, shallow depth of field.
Material / texture: visible pores, matte skin, natural imperfections.
Constraints: no plastic skin, no waxy shine, no extra jewelry, no random text.
- 3.
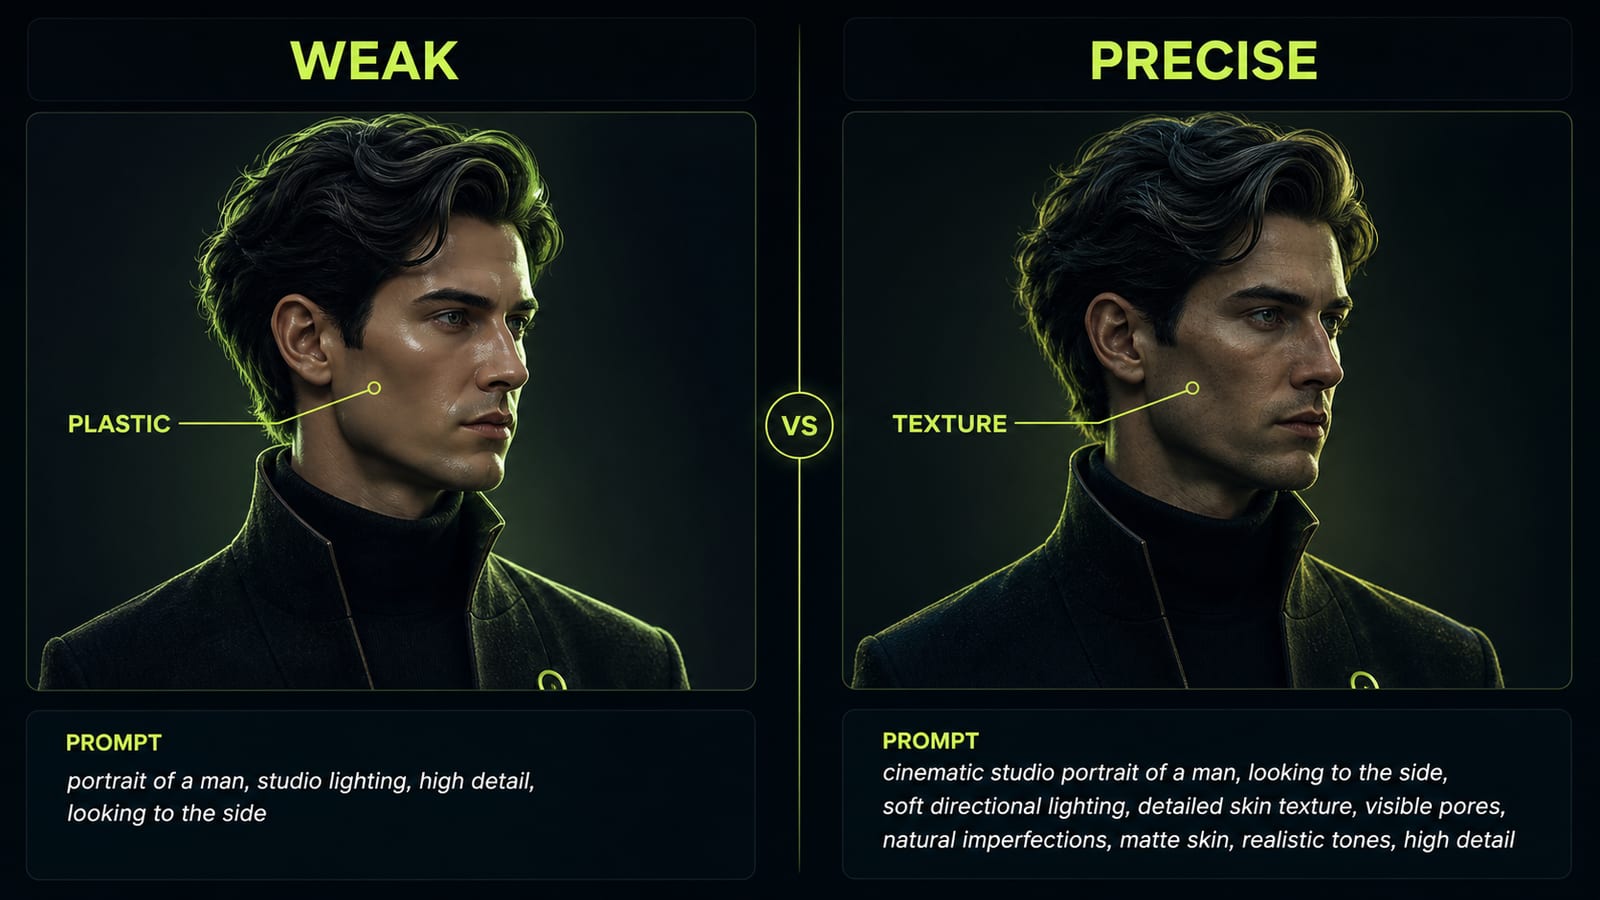
Fix portraits with details, not `realistic`
The common failure case is a portrait that looks clean but plastic. Adding `more realistic` rarely fixes it because the model does not know which axis failed: skin material, lens, light, retouching, or negative constraints. Name the broken axis. Practical case: the first Flux 2 render produced a neat face, but the skin looked glossy, almost like a 3D surface. The useful edit was not `make it better`; it was a specific constraint set: `matte skin`, `visible pores`, `subtle skin texture`, `soft directional light`, `85mm portrait lens`, `no waxy surface`. The frame stayed polished, but the face moved closer to editorial photography.
Before
Make the portrait more realistic, high quality, cinematic.
After
Change only skin rendering and lighting.
Preserve: face shape, pose, black outfit, dark studio background, camera angle.
Add: matte skin, visible pores, subtle under-eye texture, soft directional light, 85mm portrait lens.
Constraints: no waxy shine, no plastic surface, no beauty-filter blur, no extra accessories.
- 4.
Use constraints as artifact insurance
Flux 2.0 is stronger than older image models at control and editing, but complex prompts can still invent the wrong details: random text, extra jewelry, glossy skin, bad perspective, or material drift. A vague negative prompt like `bad quality, ugly` is weaker than a short list of actual failure modes. For portraits, constrain skin and anatomy: no plastic skin, no waxy shine, no extra jewelry, no warped eyes. For product shots, constrain brand and material: no logo drift, no wrong material, no extra packaging, no random text. For fashion, add a preserve line for face, pose, outfit, silhouette, lighting, and camera distance.
Before
Don't make mistakes, make it beautiful and professional.
After
Constraints: no random text, no watermark, no extra accessories, no plastic skin, no waxy shine, no distorted hands, no logo drift, no material change.
Preserve: face, pose, outfit silhouette, camera angle, background, lighting direction.
- 5.
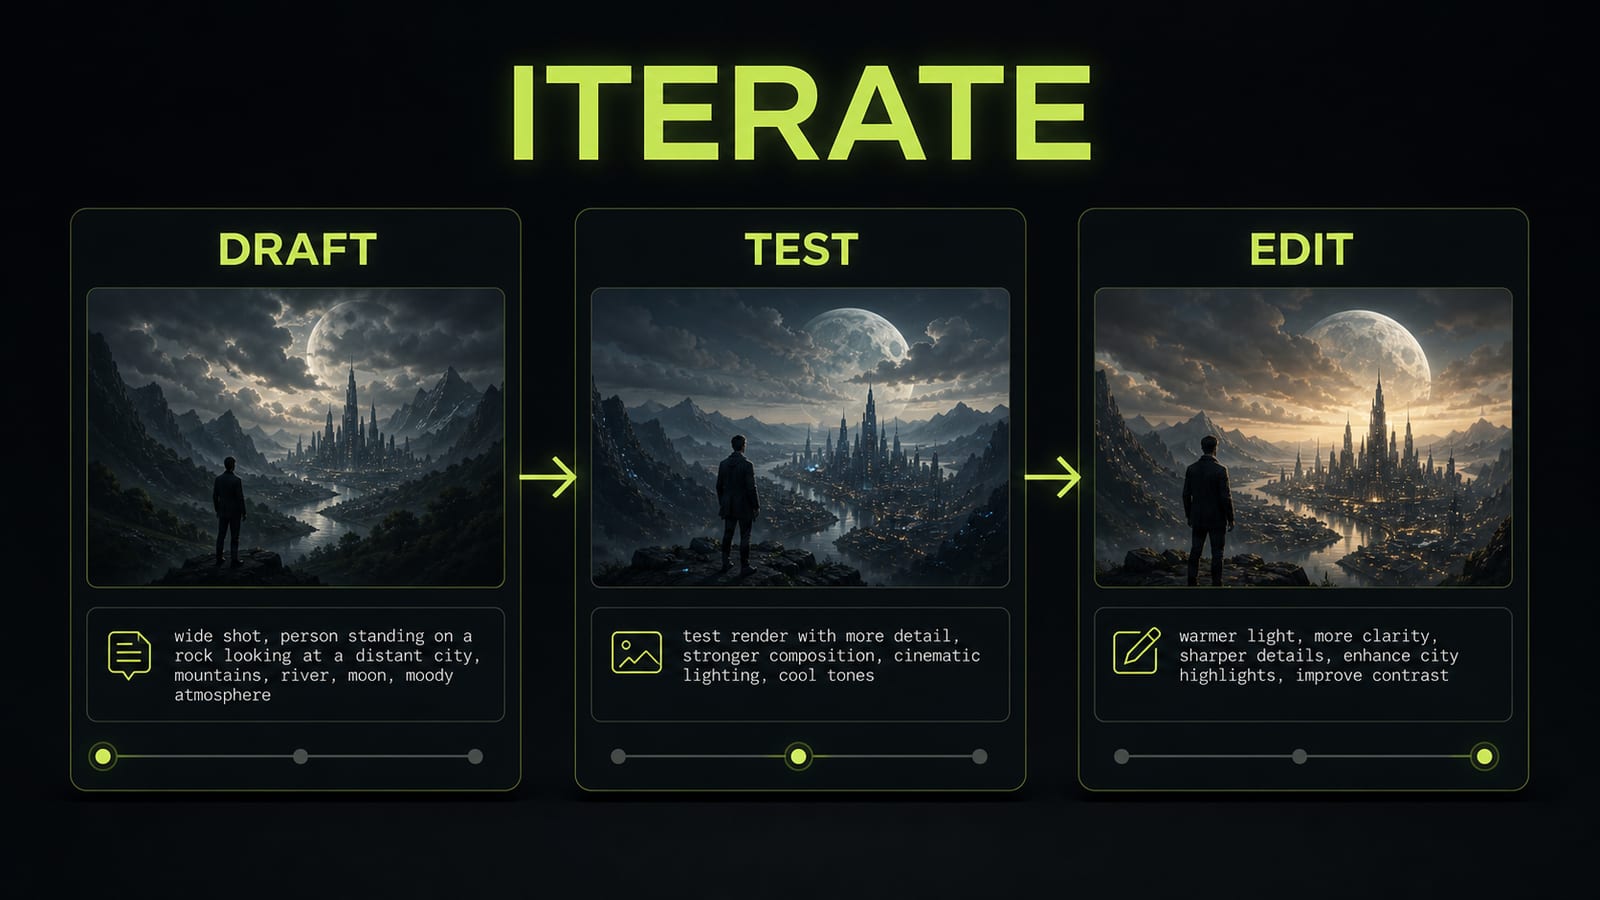
Iterate on one axis at a time
A reliable Flux 2 production workflow is draft, test, one edit. Do not change lighting, background, pose, outfit, and lens in the same pass. If the result improves, you won't know what worked. If it gets worse, you won't know what broke the image. Use a tighter loop: lock scene and subject first, then test lighting, then material, then camera, then constraints. This makes your flux 2 examples reusable: the prompt skeleton survives, while subject, style, or platform settings change. It is much faster than asking the model to `make it better` after every render.
Before
Make it better: change background, improve skin, add cinematic lighting, different pose, better camera.
After
Iteration 1: keep everything, make lighting softer.
Iteration 2: keep lighting, add matte skin and visible pores.
Iteration 3: keep face and pose, change only background to dark graphite.
Iteration 4: keep composition, remove random text and extra accessories.