Upscale image AI: keep detail before 4K
Vlad Voronezhtsev · · 6 min read

Upscale image AI increases resolution and sharpness, but it does not automatically repair a weak source image. The cleanest results come when the prompt already defines material, focal point, lighting, and constraints, so the upscaler enhances an approved structure instead of inventing missing detail.
- 1.
Decide whether to upscale or regenerate
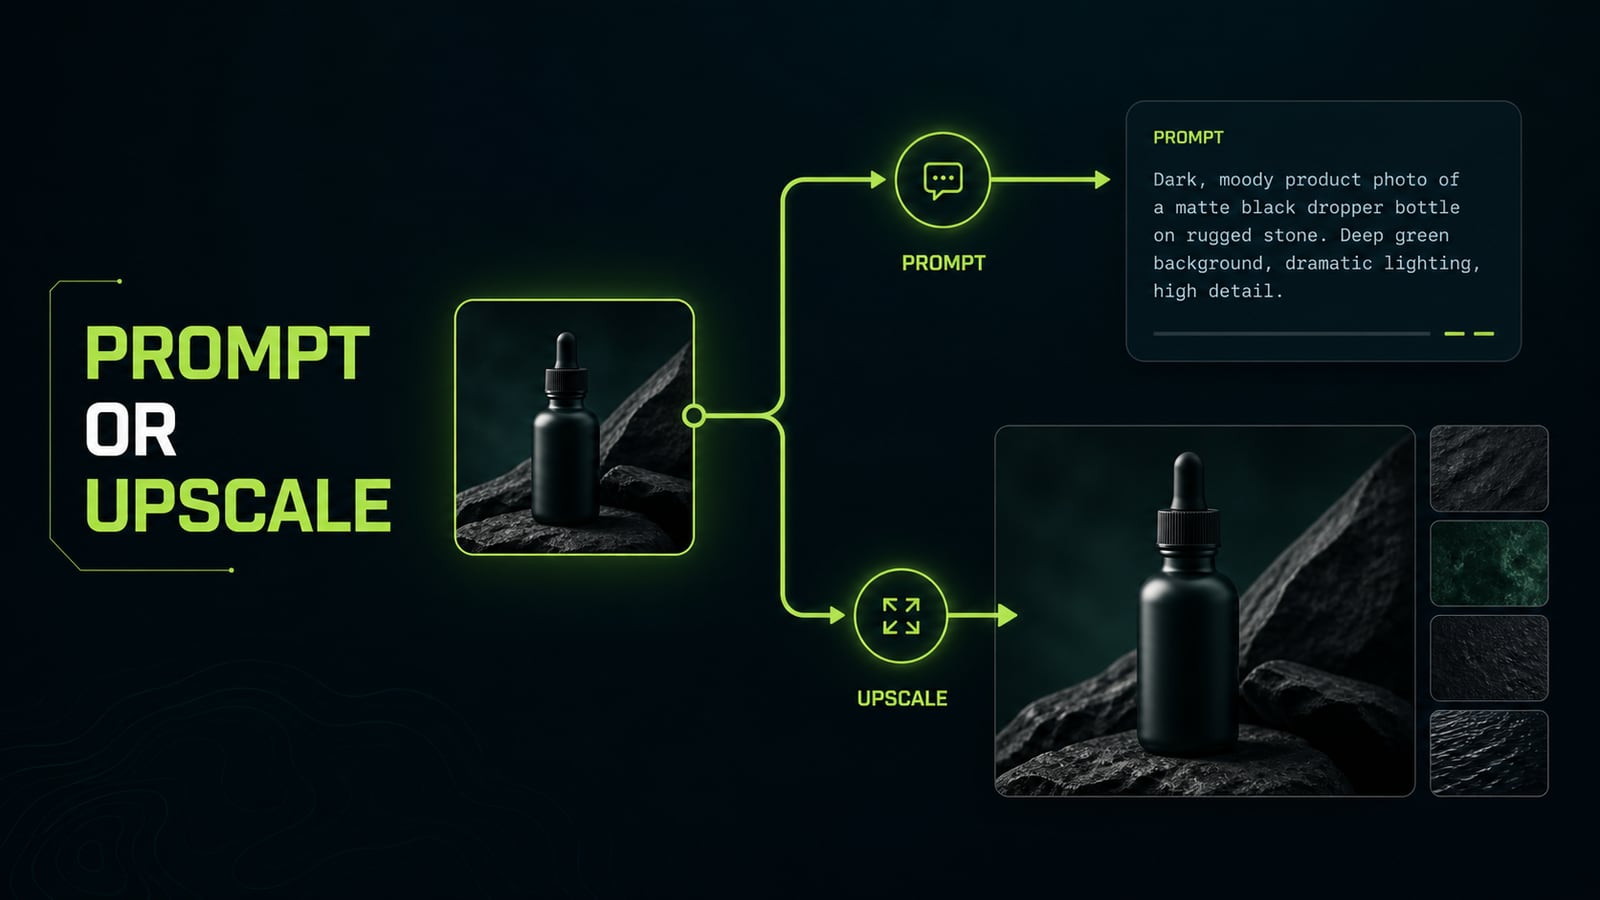
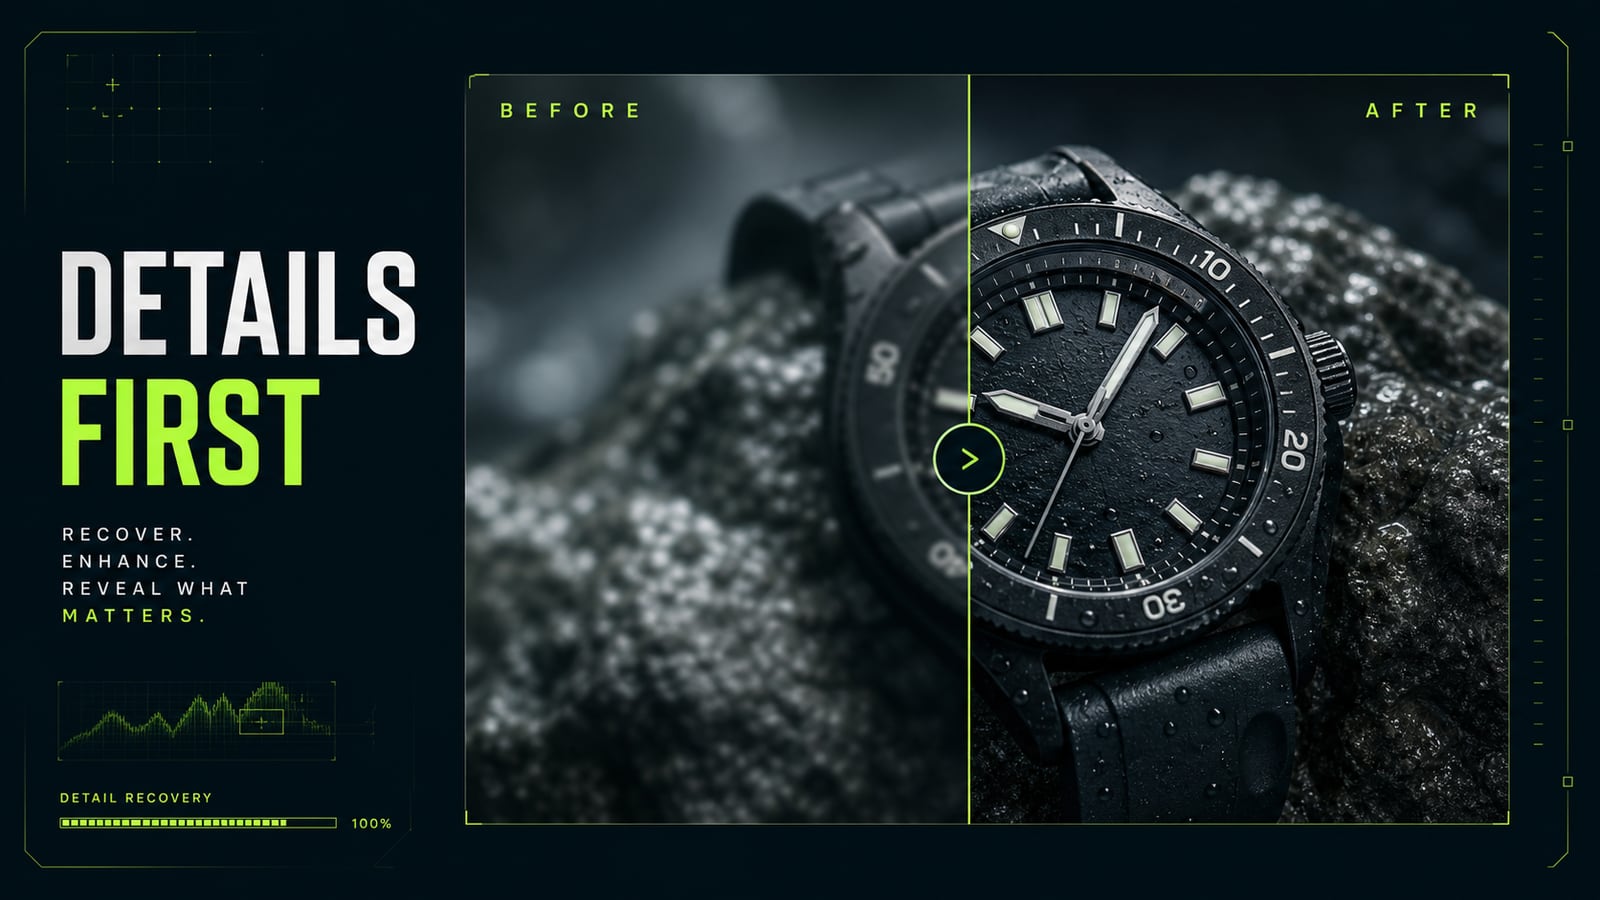
Upscale image AI works well when the source already has the right composition, a readable subject, and enough texture information. If the frame is slightly soft but the skin, fabric, glass, or metal is clear, upscaling can add useful sharpness and micro-contrast. If the object is out of focus, the face drifted, the material was never described, or the model invented a shape, upscaling only makes the mistake bigger. The first check is not file size. Ask why the image is weak. Need a larger 2K or 4K file for publishing? Upscale it. Need to repair a hand, reduce waxy skin, or remove fake hardware? Rewrite the prompt and generate a better source first.
Before
Improve this image, make it 4K, add more detail.
After
Decision: regenerate first.
Problem: material and focal point are weak.
Prompt fix: define subject, material texture, lighting direction, camera distance, and constraints.
Then upscale only the approved image.
- 2.
Prepare the source before upscaling
Searches like `upscale image ai online` often come from a rescue mindset. Treat upscale as finishing, not repair. Before using it, check four things: the subject is in focus, edges are not motion-blurred, important texture is described in the prompt, and negative constraints stop the model from adding fake detail. For a product shot, that means material detail, clean edge definition, stable label geometry, no random text, and no logo drift. For a portrait, it means natural skin texture, matte highlights, visible pores where useful, and no waxy surface. The cleaner the source, the less the upscale pass has to invent.
Before
A black bottle on stone, cinematic, high quality, upscale to 4K.
After
Product photo: matte black glass dropper bottle on rough wet stone. Focal point on label edge and cap texture. Soft directional light from upper left. Material details: glass reflections, water droplets, rough stone grain. Constraints: no random text, no logo drift, no invented label.
- 3.
Know what breaks during upscale
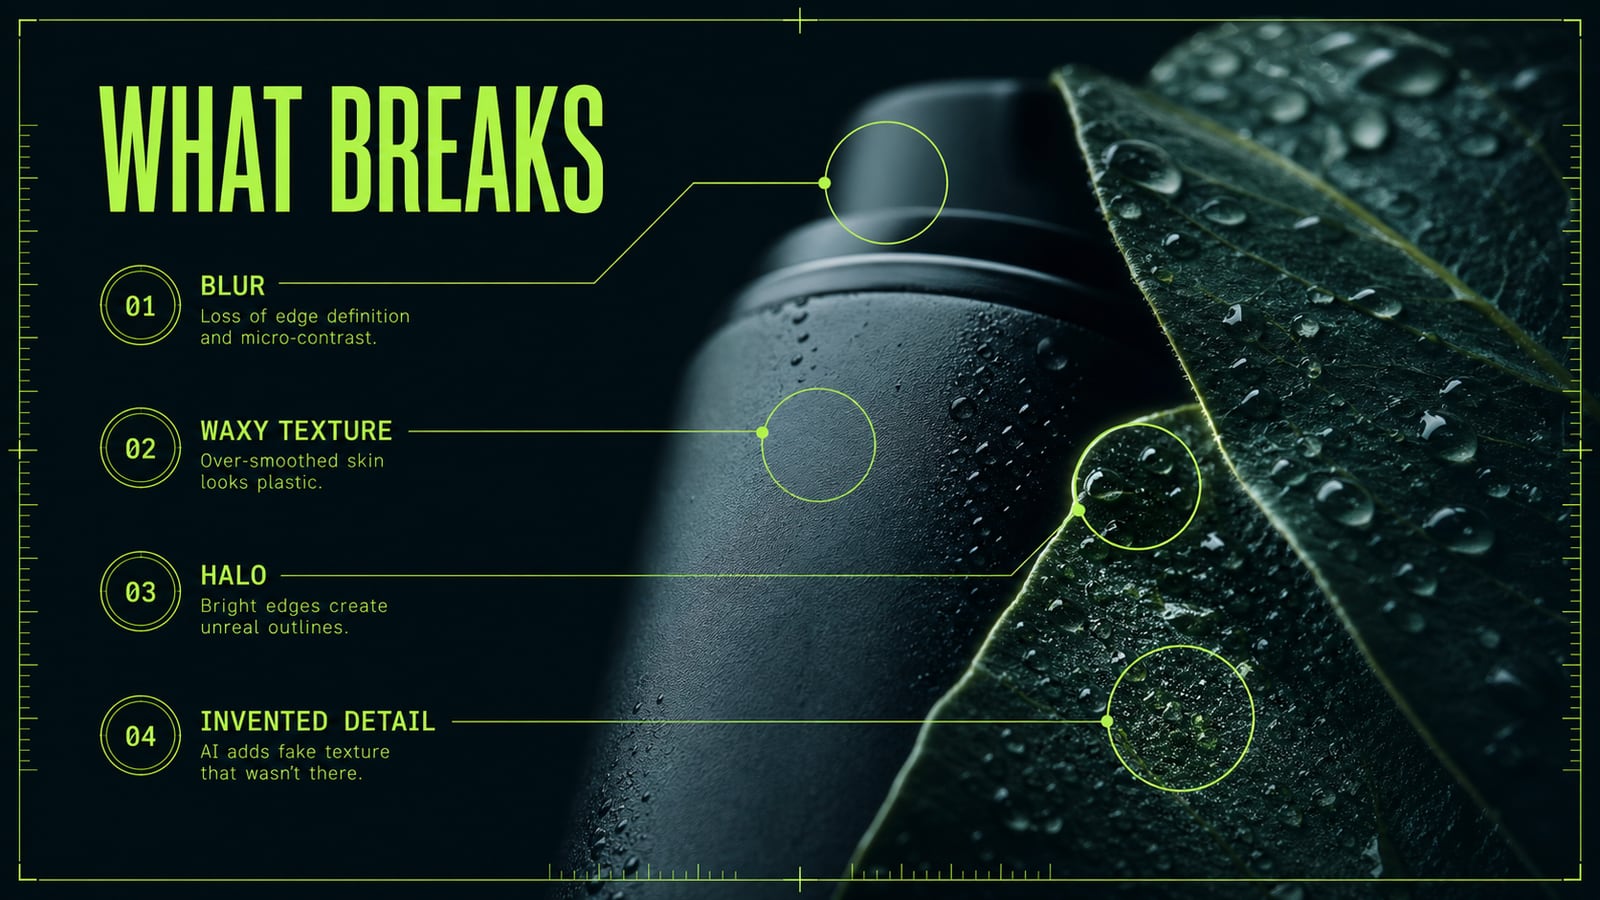
An upscaler cannot know which details were real when the source is too thin. It strengthens edges, rebuilds texture, and sometimes adds things that were never there: extra pores, strange fabric fibers, halo around hard contrast, plastic skin, or ripples on smooth surfaces. Faces, logos, small text, and complex materials show the problem fastest. Practical case: a Nano Banana frame of a black leather bag looked too soft. The first upscale image AI 4K pass added noise and made the leather look rubbery. The useful fix happened before upscaling: `matte black leather, fine grain texture, controlled rim light, sharp seam edges, no waxy surface, no fake pores`. After regenerating the source, upscale enhanced real texture instead of fake texture.
Before
Make this bag sharper and more detailed.
After
Regenerate source: matte black leather bag, fine grain texture, sharp seam edges, controlled rim light, 70mm product lens. Constraints: no waxy surface, no fake pores, no halo, no extra stitching. Upscale after approval.
- 4.
Fix one axis at a time
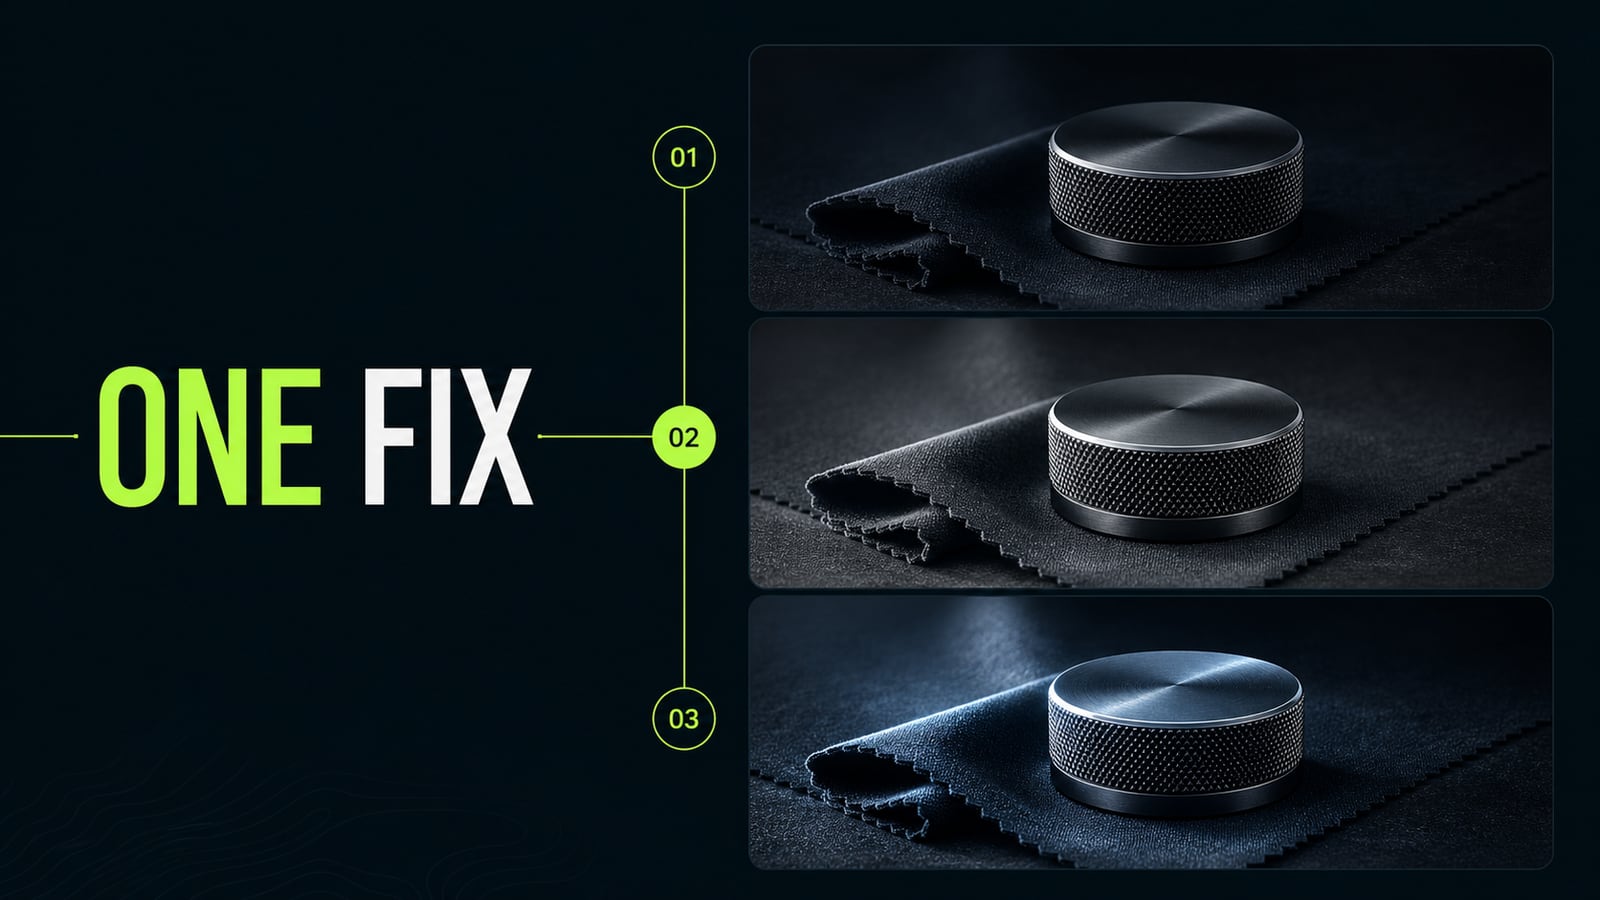
When an upscale image AI online result looks strange, do not write `make it better`. Choose one axis: sharpness, material, lighting, subject edge, text, or scale. If you change everything at once, you will not know what worked, and you may lose the composition that was already good. In Flux or GPT Image 2, use a tighter loop: approved composition -> material pass -> lighting pass -> upscale pass. Opten is useful as a preflight editor here: it expands a rough idea into prompt blocks and catches missing preserve or constraint lines before the final upscale is asked to rescue a weak setup.
Before
Make it better: sharper, different light, nicer material, 4K.
After
Change one axis only: improve material texture.
Preserve: composition, subject position, camera distance, lighting direction, background.
Constraints: no new objects, no random text, no edge halo.
After this pass: upscale the approved frame.
- 5.
Do the final check before 4K or 16K
The higher the scale, the more expensive each mistake becomes. Before 4K, inspect faces, hands, logos, small text, subject edges, and smooth surfaces. Before 16K, be stricter: a model can beautifully enlarge noise, but that does not mean the image is more useful for print, ads, or a landing page. A reliable order is simple: generate a good source, inspect meaning and detail, make one targeted edit, then run the upscale pass. For a website, marketplace card, or presentation, a clean 1600-2500 px source is usually better than a blurry file rescued into 4K.
Before
Upscale to 16K, make everything ultra detailed.
After
Final check before upscale: clean subject, stable edges, readable material, no text drift, no halo, no invented detail. If any core detail is wrong, regenerate first.


